BHPVIEW Synchronization Examples
The demo savesets contain some good synchronization examples. Open gathers_vscan_xsec.cfg.
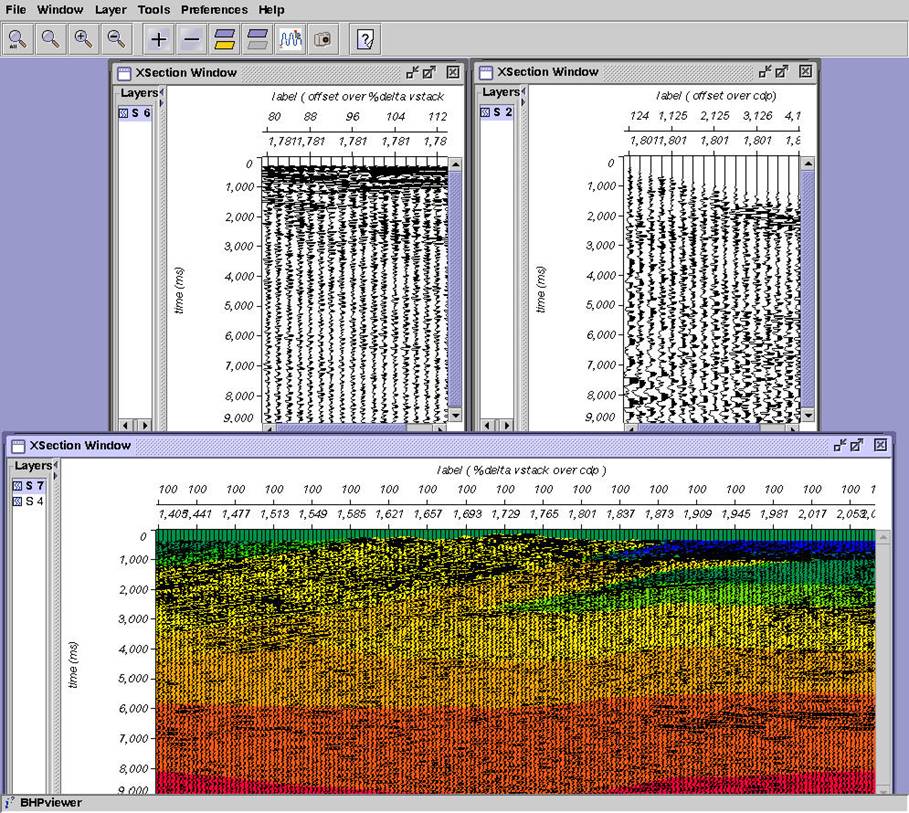
We will refer to the top-left window as w1, the top-right window as w2, and the bottom window as w3. Layers will be referred to as l1 in w1, l2 in w2, and l3a for w3’s wiggle traces and l3b for color background. Look at the dataset menu for each layer. Notice how the data is being accessed.
L1 is a cross-line, l2 is an offset gather, l3a is an in-line, and l3b is a cross-section velocity slice that contains a single line of data.
In BHPVIEW, data broadcasting is executed via MB3. Try double-clicking anywhere in l3a with button 3. Notice that l1 and l2 changed. L3a is broadcasting the cdp number and l1 and l2 are
listening, or synchronizing on cdp. If you look at the Synchronization window for each layer, you will notice that all layers have Broadcast turned on. This means that every time you change something in a layer, it broadcasts the change to all other layers. Listening is selective, meaning each layer can be set to listen to only certain events. Look at the Dataset menu for each layer. Notice that l1 and l2 have the Synchronize box checked next to cdp, and that l3a has it checked next to fldr. Also note that l3b has no synchronization enabled. That is because it has only a single line of data.
When you broadcast cdp number from l3a, l1 loads the corresponding cross-line, and l2 loads the corresponding offset gather. It also works in reverse. Try broadcasting from l1. L3a will load a new inline. If you broadcast from l2, l1 will load a new cross-line, if it is different than the one already loaded.
Now experiment by adding synchronization of a visual attribute, i.e. polarity. Broadcast a new cdp number from l3a. Then go to the Synchronization menu of l1 and set Listen to Polarity.
Go to the Display Parameters menu of l2, click Normal next to Polarity in the Layer section then select Reversed, click OK, and notice the change in l2 and l1, but not l3a.
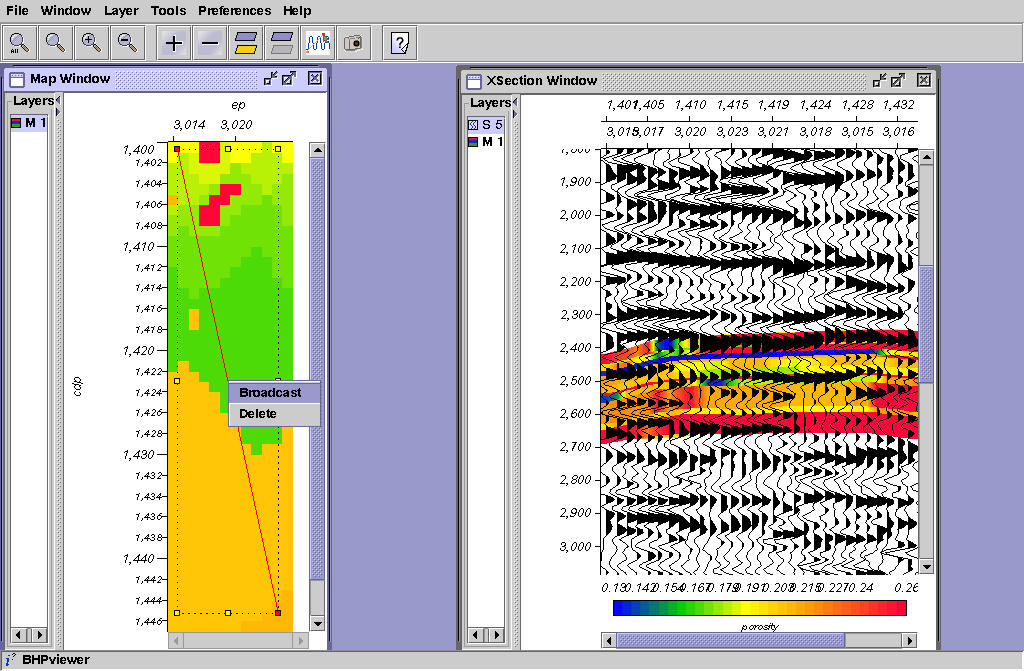
For another example of data synchronization, load the session model_seis_arb_xsec6.cfg. L1 is the layer in the left window, l2a is the seismic in the right window, and l2b is the model in the right window. Note that l1 is map-view data. Select w1 by clicking the title bar. Click the red line on l1 with MB1, and notice that it is enclosed in a box. Click MB3, and select Delete. Now click and release MB1 near the top-left corner of l1 and move to the lower-right. The red line is an arbitrary traverse. Click with MB1 then MB3 to stop drawing and highlight. Click again with MB3 to see pop-up menu. Select Broadcast and notice w2. The color maps between l1 and l2b are also synchronized. Check it out.